Prusa Mini 3D Printer -- Troubleshooting, Maintenance, etc

Useful info gathered while using the Prusa Mini …

The Prusa Knowledge Base has some really helpful info, though being crowd-sourced it’s not all top-quality. Remember to search for Mini articles, as there are other printers in there too.

  • Assembly instructions for kit version (Although we bought the part-assembled version, this guide has good detailed intructions and photos of all the parts so you can see how it all works.)

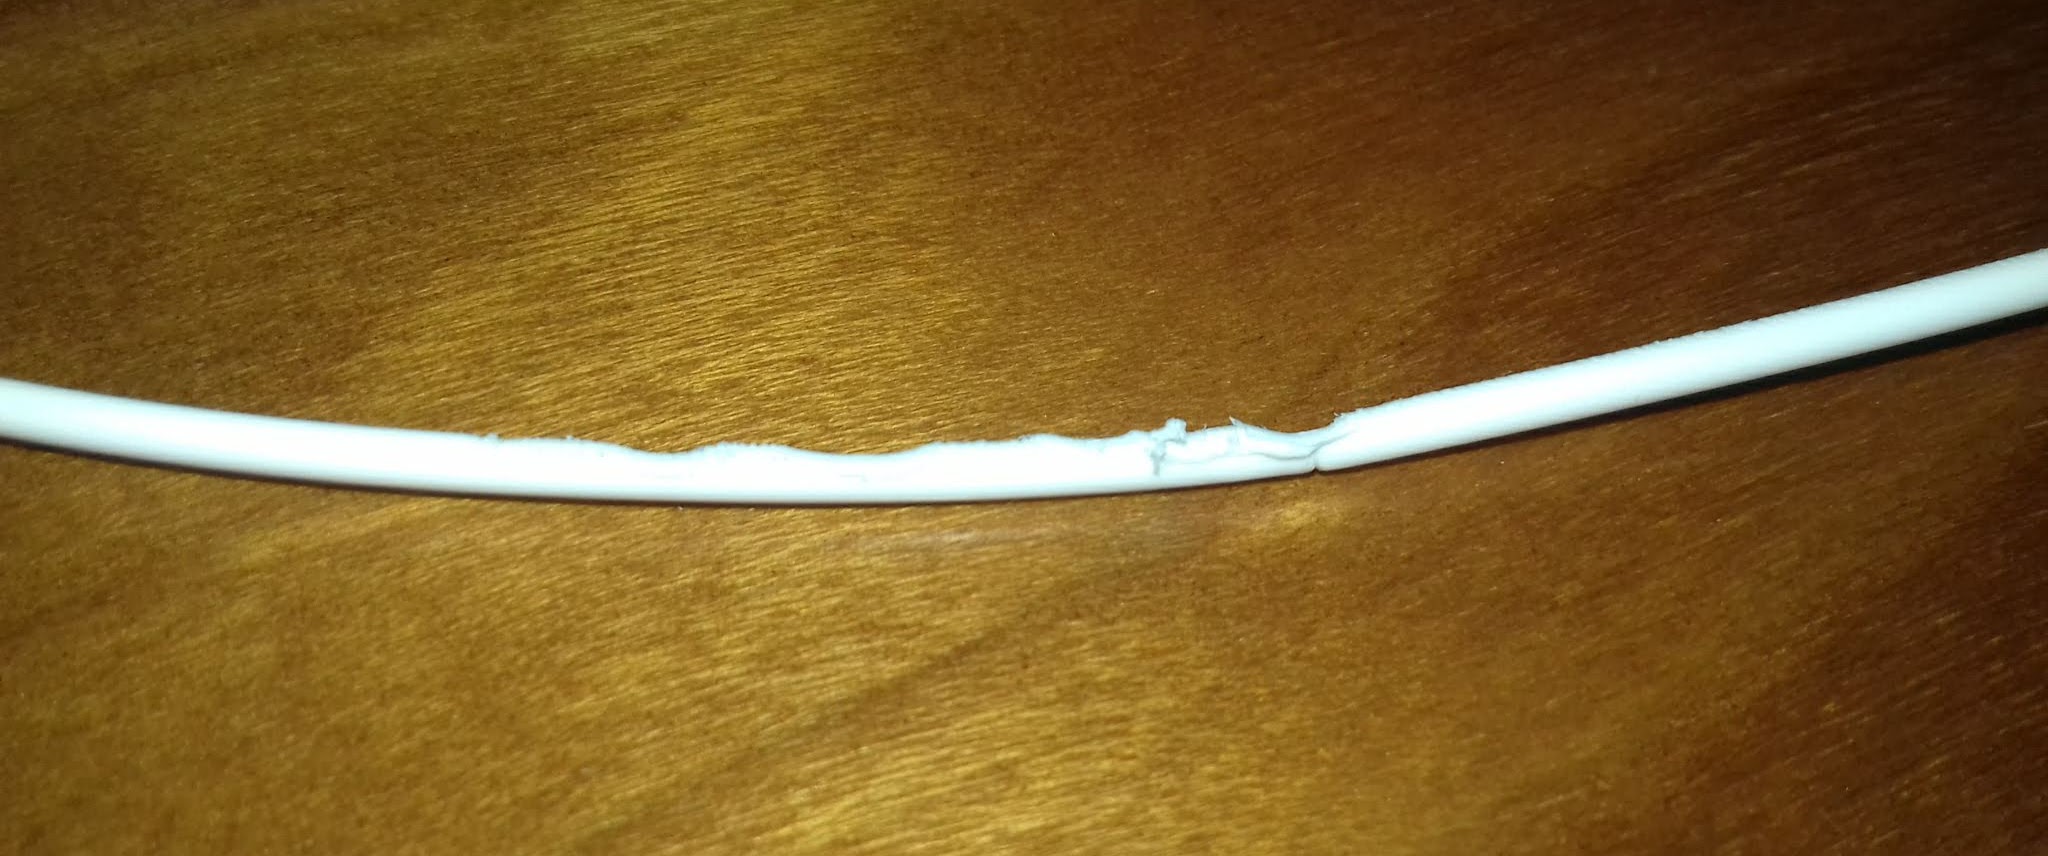
Printer started chewing filament. This meant it was unable to feed it through and therefore nothing was reaching the nozzle. The printer carried on making the movements of the print, but stopped extruding filament.

First thought was a blocked nozzle/hotend, which I checked out (with help from https://help.prusa3d.com/en/article/clogged-nozzle-hotend-mini_112011/) and determined was not the problem

Next checked the extruder pulleys, opening two hatches to have a look. There were signs of filament dust, which I cleared using compressed air, but I wasn’t able to get a good look. (Tried a test print after this and the same thing happened, so the search continued.)

I decided to take the extruder apart to get a proper look at the pulleys, as detailed here:

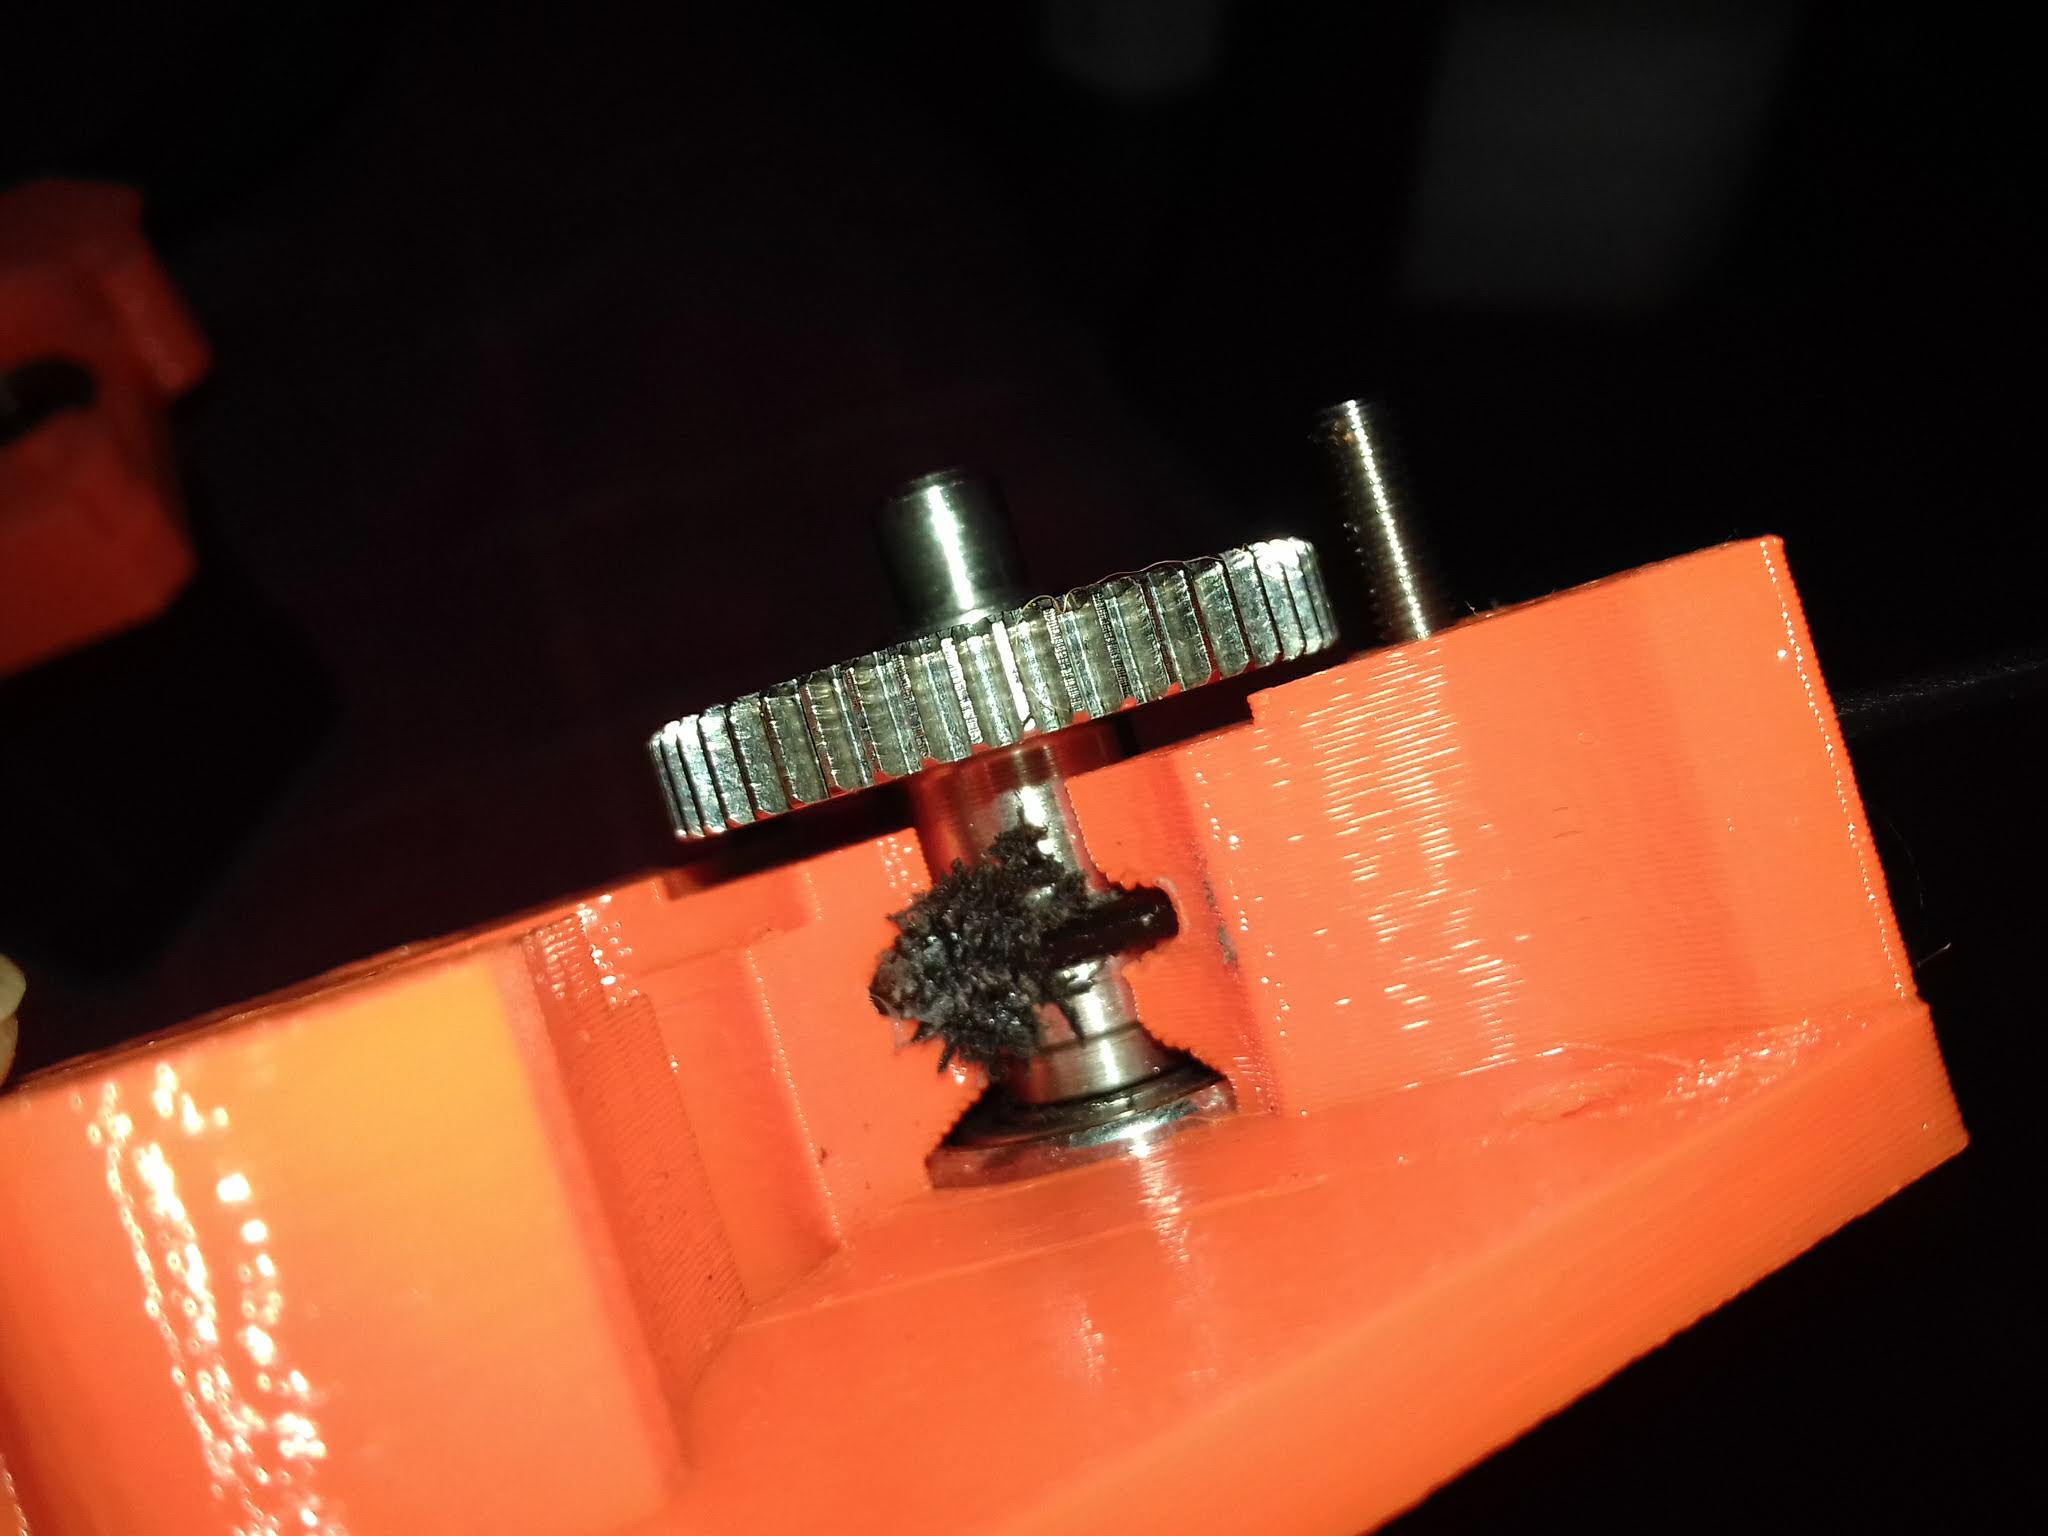
and this revealed a chewed=up chunk of filament that was jamming the pulley.

(In order to reveal this I had to remove the extruder idler screw and cover. I found the extruder assembly intructions for the kit version of the MINI useful when it came to re-assembling!)

Having found the following note I suspect the problem may have been a too-tight idler screw, and have attempted to set it correctly:

The idler screw is located right below the PTFE tube where you load the filament This adjusts the pressure of the filament onto the filament pulley.

If you find that the extruder filament pulley is full of plastic residue, the idler screw may have been adjusted too tight. It can be adjusted with the 2.5 mm Allen key. The head of the screw should be flush to just within the printed plastic part of the extruder when the filament is not loaded.

(From https://help.prusa3d.com/en/article/clogged-nozzle-hotend-mini_112011/ )

Test print underway, and fingers crossed …

… Sadly this doesn’t seem to have fixed the problem. But leaving it here as it’s all good info, and we may well need it again :frowning_face:

2 Likes

One thing to note: we first successfully printed in mid-Jan:

so the filament has been sat out on the printing desk without desiccant or humidity control for 15 weeks.

Also to note: if we have to iterate over the setting of this idler pressure adjustment, we should turn the screw in until it just stops and then turn it back some counted number of turns, so we know what we’ve tried. (But maybe @Joe has a better debugging idea…)

Had another go today: Took the extruder apart and gave it a good clean, removing the debris left in there from the previous failed attempt.
Reassembled the extruder and loaded a new batch of filament (freshly opened, white PLA, not Prusament) in case the previous lot had somehow got degraded due to sitting out in a room for a few weeks.

This attempt failed much more quickly. Although it initially seemed to be feeding filament OK, it stopped extruding halfway through the calibration layer. Managed to unload the filament to find this:


… being chewed by the extruder, as before.

We’re advised, then, to experiment with either tighter or looser feed tension. (If I’d had to guess, I’d wonder if somehow the head was cooling down when it shouldn’t, so the feed is jammed because there’s no melting going on. But perhaps there’s enough intrumentation that the printer could tell us if that were so?)

The “Marlin” based firmware on my Ender3 shows target and current temperatures on the main screen.

Searching around, it looks like Prusa have the same (I guess that’s current/target)
image

There’s the front display that @Will found that shows live and target temperatures. I wouldn’t expect it to cool down but a blockage is possible. My feeling is the tension is too tight. We can do things like change the nozzle or do a cold pull if we need to rule blockages out.

TLDR: Think I may have fixed the problem. Hooray.

Came across a video and associated comments which sounded very much like the same problem, caused by the supplied PTFE tube in the hotend being fractionally too short. (Spec is 43.4mm +/- 0.1mm, but several people reported the one in the original build as being 42.7mm.)

Luckily Prusa also supply a spare, which turned out to be a bit longer than the original, so I was able to replace it, following these instructions:

Once this was done and I’d given the nozzle and extruder a good clean out, I managed to get a complete Benchy printed out. A bit whiskery but definitely complete.

So I am cautiously optimistic that this problem is now fixed, and ready to print something useful.

2 Likes

Al, any space at “Share : Frome”?

Yes, it would be great if we had space and money for this but Share is currently overflowing with inventory.

Incidentally @qscons did flag up Precious Plastic a while ago in an email when we were visiting the topic of plastic recycling and 3d printing. His conclusion was that if Stormboard weren’t already doing this sort of thing in Frome it would be worth looking into. Here are some of the links from that email:

Thanks for info. By the way, ‘Stormboard’ are no longer in Frome, they moved to Hull some time ago.

Additionally, check this out. https://www.plasticshed.org/book-a-workshop

Lastly, if you did manage to somehow find the space, I’d buy a piece of *equipment for Share : Frome…

*Plastic recycling gadget.

https://stormboard.net/